Norton Swingarm Bushes
Part # 06-0447
Here is a simple guide for replacing your swing arm bushes using the modern graphite replacements.
As with any work on your bike you should always refer to the appropriate Norton Workshop Manual before starting.
Remove the rear wheel from the swingarm.
Remove the lower shock mounts from the swingarm and rotate the shocks out of your way and tie them up.
Remove the small bolt that holds the swingarm to the swingarm shaft. It is in the center of the swingarm under the horn. There is poor access to the bolt head so be patient. Later commandos have a different setup so check the workshop manual.
Remove the outer cover (locate the grease nipple) of the swingarm by unscrewing the long skinny bolt.
At this point nothing is holding the shaft in the swingarm but rust. It may take a lot of force to remove the shaft. Use the 1⁄2 fully threaded bolt and nut to make a jack to remove the shaft. The shaft has 1⁄2‐20 threads. Use a socket that is bigger than the shaft on the inside hex and on the outside diameter that fits squarely on the shoulder of the swingarm. Fully thread the nut on the bolt and put the socket under the nut and tighten the bolted assembly to the swingarm until the bolt stops threading. Hold the bolt head and tighten the nut until it is flush against the socket and it will start to pull the shaft towards you when great resistance is felt.
Once the shaft is pulled out the swingarm is free to be removed. There is a cover on the other side that will fall out.
Remove the old bearings
Remove the oillite bearings from each side of the swingarm using a press if you have one or insert a socket slightly smaller than the outer diameter of the bearing and hammer away with the back of the swingarm supported. The dust shields that are behind the bearing flange should fall out.
Preparing the swing arm for the new bushes
Totally degrease the swingarm, shaft, engine cradle hole and all parts to be replaced. This is important as the graphite is now your lubricant so dirty, oily parts are not desired. At this point, check your parts for looseness and corrosion. A rusty, pitted shaft or loose fitting shaft to engine cradle should be fixed at this time. The shaft should be a tight fit in the engine cradle. The swingarm bores might be a little rusty and require a light hone to clean up.
The new bearings should be a press fit to the swingarm. Stop if they are not. It should take a good bit of force to install. Install the graphite bearings from each side of the swingarm using a press if you have one or use the bolt, nut, and washers with a socket slightly smaller than the inner diameter as shown in the pictures below. Don’t forget the metal dust shields under the bearing.
Apply a dusting of graphite powder to the bearings. Apply a dusting of graphite powder to the shaft. Do a dry fit of the bearing and shaft. The new bearings will be a tight fit to the shaft but should rotate freely once dusted and installed.
Put new o‐rings on the outer diameter of the bushings just like the old ones. Insert a new o‐ ring and tape the inner end cap in place. Replace the swingarm on the engine cradle. Align the shaft to pass through the swingarm and engine cradle. Insert the 1⁄2 diameter bolt to help align the shaft and rotate to get the small cross bolt to line up. After installing the cross bolt, check that the swingarm rotates freely.
Install the outer endcap with a new o‐ring using the long screw. A 1⁄4‐20UNC set screw can be used to block access of the grease fitting hole or you can re‐use the old grease fitting but just don’t ever grease it.
Re‐install the shocks and rear wheel.
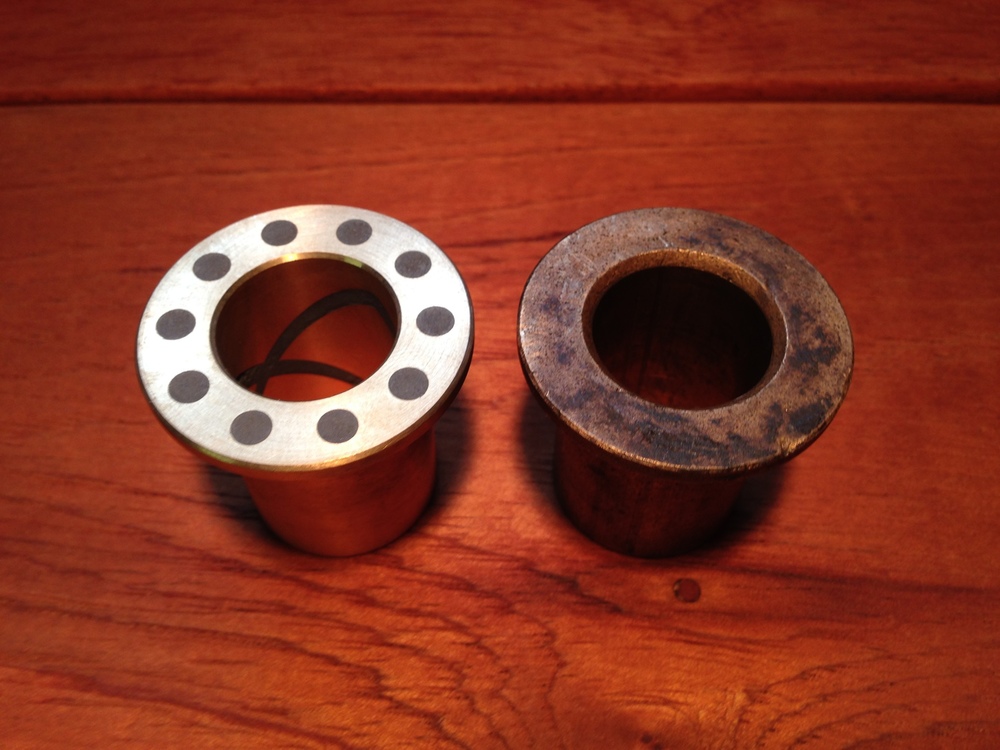 New bush and used bush (06-0447)
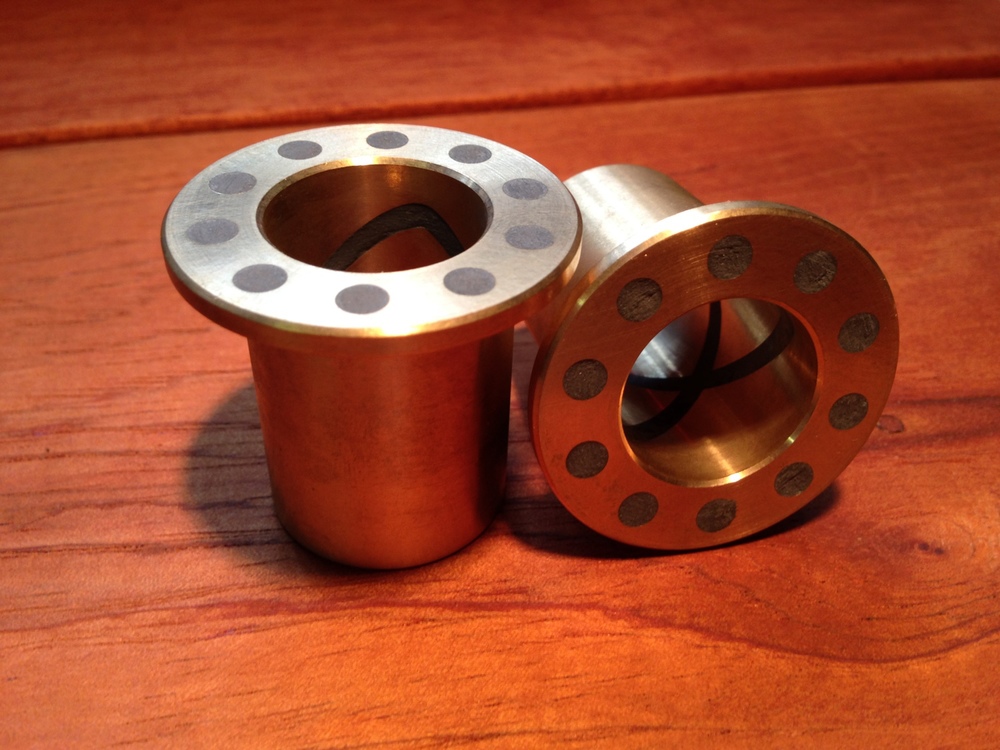 New set of graphite impregnated bushes
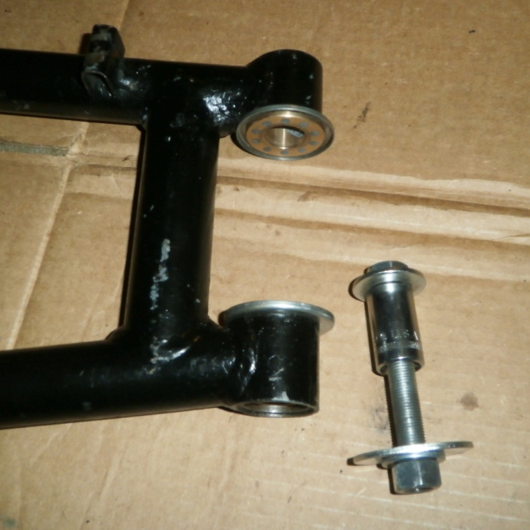 Swingarm and homemade tool setup
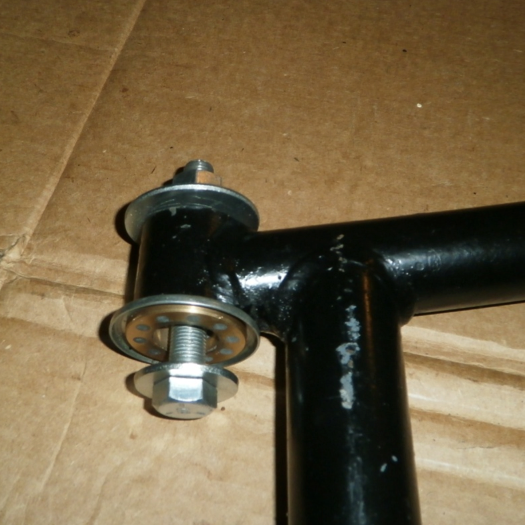 Swingarm and homemade tool setup
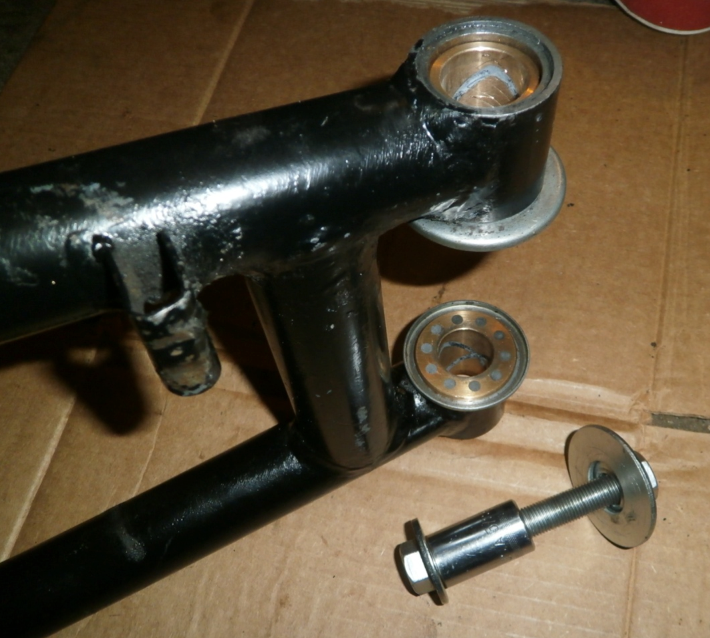 New bushes installed
